


 मिर्जापुर, उत्तर प्रदेश")

Starting a travel blog and sharing about India and the world is an amazing experience for me. I love sharing my and other’s traveller story. In this post, I am going to share my personal travel blogging journey on how to start a travel blog, buying a perfect web hosting plan and will guide you on how to set-up it wisely in a few simple steps for beginners without any coding knowledge.
This post contains some affiliate links. If you click, sign-up, and make a purchase using my link. I earn a commission without any extra cost to you. That helps me to keep running my blog.
When it comes to setting up a website for a non-coder it feels how much it would be difficult? But it’s not true. A lot of big articles have been published on the internet but in this post, I will capture the complete theory in short.
We read many inspiring stories on the internet about making money online. But do we don’t how much it’s true? Making a blog successful always takes money, time, and effort and nobody reveals the truth behind it. People shares about blog making money but no one shares the expenses behind it.
I am only a man who manages this complete blog. I was working as a Digital Marketer, I don’t know anything about how to set up a website/blog. But I was passionate and decided to do all the setup all my own. At that time I used to read a lot of blogs and gathered knowledge about hosting, buying a domain, and Word Press.
It took many years to make my blog look like a professional. But, I don’t lose hope and keep working and exploring I took these mistakes as a challenge. You will be surprised to know my blog was deleted and hacked three times so far. So, all this problem gives many opportunities to learn and set up my travel blog.
So, here I will be sharing my true learning and resources that I earned in the last 10 years about How to set-up a Travel blog from scratch.
Here a quick overview on how to start a travel blog
- Find a domain name that matches your personality
- Select the best hosting provider
- Installing WordPress
- Learn about WordPress Setting
- Theme Selection
- Create a Logo
- Security Plugin
- Create your first post and pages
Step 1. How to find a name for your travel blog
Find a name that suits your personality, like I have selected a domain name travelnthrill.com a combination of two words travel and thrill. Travel is taken because this is the travel blog and thrill. After all, I like thrilling ancient Indian stories. Once you have decided with the domain name and don’t forget to check all the social media profiles that username is available or not.
For instance check my Social Media Profiles – Facebook, Instagram, Pinterest, Linked In, and Twitter.
So, when you create a travel blog select the best domain name using the tool below. Research and think smarter to pick up the domain name for your travel blog. It’s because I am saying the domain name you will decide will be with you for a lifetime.
Try this tool and check your availability for the best travel domain name. Also, get a 1-year free domain on buying a hosting plan with Bluehost.
Bonus Tips:
You can also use KnowEm tool to check available user name over 500+ popular social media platform.
Tips for Finding a Perfect Domain Name
- A domain name is like a brand name that should be unique and did not match with the other competitors.
- If your domain name will be unique you will easily get your profile name on all major social media profiles.
- Buy a .com domain if you want to target globally.
Click to Get a popular domain today at Just $0.99! from NameCheap.
Step 2. Find a Perfect Hosting Plan
I was very much confused when I have to decide on a budget and good hosting plan that can handle my minimal traffic load. I read a lot of online reviews and asked on several forums for finding a reliable hosting company, Meanwhile, I put my travel blog to test on other hosting but it goes down when 10-20 visitors landed at a time server stopped responding. At, that time my monthly traffic was around 10000 pageviews.
So, I decided to go with Bluehost and its budget hosting and work best with the WordPress CMS. Its basic plan can handle 10-15 k of monthly traffic easily. So for a new blogger, it’s a good option to start with a basic plan. You can buy using my link to make a purchase for your personal travel blog.
Hostinger another premium quality web hosting service provider. It offers a free domain and SSL protection and is specially optimized for WordPress blogs. Click to Signup for Hostinger.
- 80% OFF Web Hosting SALE + FREE domain.
- Free SSL & CloudFlare included.

Step 3. Installing a WordPress
You have done with a domain and hosting and it’s time to set up a WordPress. The great thing about Bluehost hosting is an auto-install WordPress, there is not much to do with it like creating a database name, just give a username and password, and all set for start travel blogging as just as simple.
Tips for selecting a user name and password for WordPress
- Don’t use admin as a user name, such a username can be hacked easily.
- Don’t use a regular password, generate an online password that can’t be usually hacked.
- Hackers use tools that run with a combination and if any website matches it they hacked it.
Bonus Tips:
I use LastPass Chrome extension to save all my password and I also used it for generating strong online password using LastPass password generator. I found this tool very useful it will not protect your password but also save your time. It will login your account once you open any website. All you need to do just save password in LastPass.
Step 4. Manage Blog from WordPress Dashboard
Login to your website and come up on the dashboard you will see such a screen.
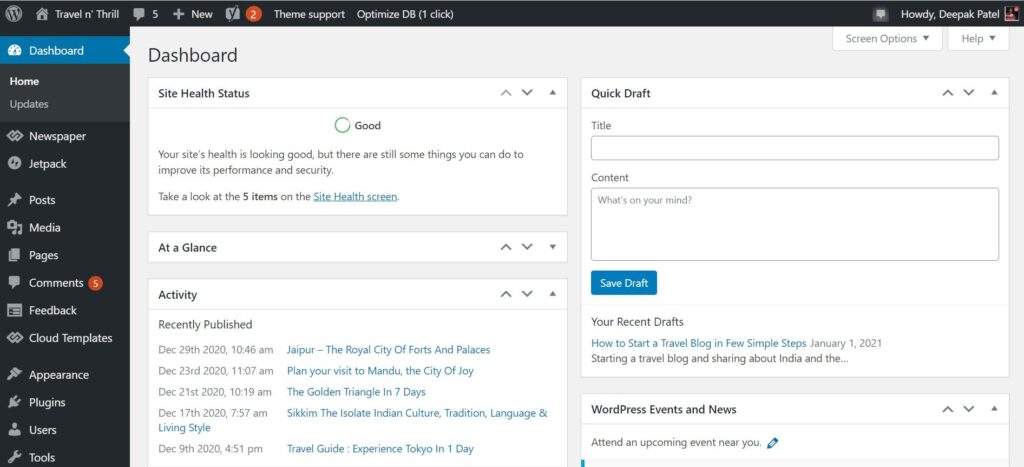
You will see pages and posts option and under post you will get categories, tags for your blog. Remember posts and pages are for two different purposes. Pages are just a single page like a page of About Me, Contact Us, and other side whereas posts are the section where we write your blog post and put it into different categories.
Therefore, you can decide which pages you want to create for your blog and the post will regularly go on.
Bonus Tips:
There are some important pages that every travel blogger/website forgets to create. Some don’t know the importance of such pages. Yes, I am talking about the privacy policy or disclaimer page. These pages inform the user about the content and services you are offering. So that a user should know their rights and limits and you will save yourself from any legal issues.
Step 5. Buy A WordPress Theme
Once we install WordPress and set up your travel blog theme. We saw a lot of free themes are offered by WordPress. We can use it for while till we are learning. Such a free WordPress theme has a limited feature to use it. So, I recommend buying a paid WordPress theme from Themeforest.net where a lot of WordPress themes is available.
I am using the Newspaper theme which is one of the most loved and sold theme. Newspaper theme has sold more then one lacs copy and its the bloggers first choice. This blog is running on Newspaper theme and if you liked my blog design you can Buy Newspaper theme.
Step 6. Creating a Logo
If you are a professional graphic designer then you can create a logo on your own. But, if you are like me then you can use Canva.com to create a Free logo, social media post, and stunning blog post images. It comes with a lot of great ideas which you would have never think of it. All the images on this blog made by using Canva.
You can try my link to Get a Free 30 Days Trial.
Step 7. Security Plugin
Security is very important for any Website, So, I use the Wordfence security plugin to save my website data from a brutal attack. I use the free version and you can download Wordfence security plugin for your WordPress website.
Step 8. Create your first post and pages
Now you are all set to go, domain, hosting, WordPress, logo, pages, and categories all is done. Now we are here to publish our first post. Just hit the post button> add new> give the title and write a blog, once you are done with the content just hit the published button.
Read my blogs on WordPress Plugin, Monetization and Google Tools
- WordPress & Optimization Plugin
- Blog Monetization
- Guest Blogging
- Google Analytics
- Webmaster Tools
- Content Writing Tools
- Blogging Resources
Meanwhile you have any question on how to start a travel blog feel free to put into the comment section or you can also contact me though about us page. I am happy to share my real blogging journey with you.
Discover more from Travel n' Thrill
Subscribe to get the latest posts sent to your email.


Nice breakdown here Deepak. Anyone can start a travel blog following these steps because your tutorial rocks. Few see the journey through to becoming a pro for many reasons, but first and foremost is most feel travel blogging is easy. Nope. This skill needs to be developed over years because it has many moving parts.
Ryan
Hi Ryan,
Thank you for your generous feedback. Yes are right, our first step to success is to take action without being worried. Success will come with time and effort. So, there is nothing to fear. Just start blogging from today itself.
Thank you
Deepak
Good tips to start a travel blog! I would like to add one more thing to the list – a good digital camera. It is must for travel bloggers because without photographs a travel blog will look dull and boring.
Hi Rezmin,
Thank you for giving your valuable time. Yes, you are right but post is more on technical. I will create a different post for travel gadgets because without camera travelling is incomplete.
Thank you,
Deepak Patel
Hi Deepak, you post is interesting, engaging, and practically feasible for implementing. Thanks for sharing your knowledge and experience as a travel blogger.